This week we learned how to use the 3DEqualizer to track a shot and calculate the trail of the camera. I learned it quickly because I have learned the tracking tool in Adobe After Effects.
Compared to the AE, I need to do more manually in the 3DE, like choosing the track point and fix the result. It needs more time but the results are more accurate.
This is my final result:
In the class, Dom answered some questions that I thouht were very important and useful.
The tracepoint: We should choose points in the image that is high in contrast and clear, but not the edges of the wall. As the camera moves, the foreground and background change inconsistently. This causes the tracepoint to rotate, eventually produce the wrong result. So we have to pick points that are on the same plane.
Brightness and contrast: During tracking, we can adjust the brightness and contrast of the picture. However, it should be noted that the brightness adjustment here has no effect on the results, just to facilitate us to choose the appropriate tracking point. But if the contrast is high, then it may have some influences.
Foreground, middle, and background: Try to choose more tracepoints to get better results. It is important to note that the points on the background are likely to be occluded and should be tracked several times. It’s hard work. But we have to do it for a better result.
Deviation: It’s very important to get as close to 0 as possible but not equal to 0. Moreover, not all the tracked points have to be calculated, and some will increase the deviation.
Part 2: Polish stylised walk
First of all, I added some actions to the blocking animation last week. I want to study more about the style of Tom&Jerry.
About Luke’s feedback on my reference, actually, I also thought of the question when I was looking for a reference. When I wanted to make an animation, if my reference is an animation made by someone else, is this plagiarism? In this task, I want to imitate the original animation style of Tom&Jerry, but in my original production, I think I should avoid using other people’s animations as a reference, especially 3D animation.
In the spline pass, I met a serious problem. Tom’s arms cannot rotate in the right direction. In the beginning, I didn’t know what to do so I modified it frame by frame, but the final result was not good. Luke showed me the usage of Euler Filter, which is a very helpful feature.
before modification:
If the rotation value of animation curves are limited to a specific range, these curves may be damaged. The problem can be corrected by filtering these curves.
Euler angle uses three separate vectors (X, Y, and Z axis) to calculate rotation interpolation.
In the Graph Editor, select the broken animation curve (for example, Rotate X, Rotate Y, and Rotate Z), then Select “Curves> Euler Filter”. The filter is always applied to the entire curve, not to the selected curve segment within a certain period of time.
In actual operation, when you see a part of the curve that obviously has a big change, and it is in the opposite direction, it is very likely that you need to use the Euler filter to correct it.
After modification:
Part 3: Render farm
Finally I used the render farm
Connecting to the M311 computer through VMware, and then sending the project I made on my laptop to the PC through Onedrive, I can use the Deadline to quickly get the rendered picture.
Visual culture is the aspect of culture expressed in visual images.
Mise en scene
In the previous blog, I briefly recorded some learning content of mise en scene and some basic concepts. Here I re-summarize the content of mise en scene.
Scene scheduling comes from French, meaning “placed in an appropriate position” or “placed in the scene.” Starting to be used in stage plays, movie scene scheduling includes two levels: actor scheduling and shot scheduling, in addition to the internal elements of the screen such as light and shadow, space, scenery, and clothing.
Actor scheduling The director uses the change of the actor’s movement direction and position, as well as the dynamic and static changes when the actor communicates with the actor, etc., resulting in different shapes and scenes of the screen, revealing the changes in the relationship between the characters and their emotions.
Camera scheduling The director uses the change of camera position and various perspectives to obtain lens images of different angles and viewing distances to show the changes in the relationship between the characters and the atmosphere of the environment.
The combination of actor scheduling and Camera scheduling constitutes the scene scheduling of the movie. Its flexibility can make the actor and the camera in motion at the same time so that the performance and action of the actor can go on without interruption, and the emotions are not interrupted. At the same time, it is conducive to show the relationship between the characters and the environment, and achieve the effect in one go.
Scene scheduling not only refers to the scheduling within a single shot but also includes the scheduling of a complete scene formed by the group of shots.
Scene scheduling and long shots are regarded by the French film theorist Bazin as the historical development tendency of film language realism, and they have become the relative aesthetic spirit of expressionist montage aesthetics.
This theory influenced the French “Movie Notes” critics to establish the relationship between scheduling style and “authorism”. After this group of commentators became the main players of French New Wave films, their films all attached great importance to the function of scene scheduling. The term “scene scheduling” has become a very important topic in film theory and aesthetics after the 1960s. In terms of creation, many directors have paid more and more attention to the expressiveness of the elements of “scene scheduling”.
I refer to some materials, and most of them analyze some classic shots in movies, such as the dialogue shots in “Rashomon”, the “silent film bridge” in “Blood Maze”, and the opening shots of “Playing Time”. But I also saw a saying that the scheduling of each movie is not only for the plot but also for the content that the whole movie wants to express. When we evaluate a song, shouldn’t it start with its interlude?
So I think this blog mainly focuses on the analysis of an animated film “Perfect Blue” that I have been paying attention to recently. The scene scheduling, visual metaphors, and color composition of this movie are all worth discussing.
The heroine Mima is an idol singer, but at the request of the agency, she began to transition to the career of an actor, but in the process of transformation, Mima, the agent of Mima, and the fanatic fans of Mima, three people All of them were mentally split to varying degrees, and a series of events occurred.
Regarding the scene scheduling, one of the more outstanding sections is that Mima just discovered a website about her life record, and her heart is full of anxiety. And the uneasy emotions generated by this plot, Director Satoshi Kon uses the following scene to convey.
①An extreme close-up shot of the Mima’s foot, running from left to right. 1.5seconds②In a close-up shot, Mima runs to the left, and the background moves. 2 seconds③An extreme close-up of Mima’s foot running to the right, with the background moving. 1 second④A close-up shot, Mima runs to the right and the background moves. 2 seconds⑤Low-angle shot, Mima running across the camera to the depth. 1 second⑥Outdoor wide shot, Mima runs out of the subway station, holding the fence and panting loudly before leaning on the fence and looking up. 12 seconds⑦Subjective shot, the clouds in the sky moving slowly (Mima still gasps). 5 seconds⑧Close-up of the frontal shot, Mima is still breathing, and then turns to look right. 5 seconds⑨Mima taken by the camera is displayed on several TV sets for sale, staring at it for a moment, and walking out of the TV screen. 4 seconds
We know that in movie scene scheduling, the motion direction of the subject will form an invisible straight line, that is, the “axis”. In the shot scheduling of a scene, the range of camera position changes, and the shooting angle of adjacent shots are restricted by the axis. If you set the camera position randomly across the axis, it will cause confusion in the direction of movement of the characters in the picture and the visual discontinuity of the audience. In this shot, the first three shots used close-ups and extreme close-ups, as well as rapid and repeated cross-axis, to combine the inner chaos of Mima with the visual chaos of the audience, and in order to avoid overstimulating the audience’s viewing habits, these few The motion and background of each lens reduce the sense of movement. Then, a balanced depth lens and a slightly longer and gentle panoramic lens gradually calmed the intense emotions. The nervous piano sound in the background gradually disappeared, and the slowly moving clouds in the sky were also used to calm down. The mood of the audience. Later, in the final shots, in several TV sets for sale, Mima was ingested. This is a metaphor after the previous emotional preparation. The TV set illuminates Mima’s heart like a mirror. Tell the audience that the source of her fear is actually the other-self in her heart.
Visual metaphor
The image modeling language is used to make the image no longer an object in daily life, but a certain meaning in the film’s prescribed situation. The visual image constructed by the modeling language has a metaphorical function.
In “Perfect Blue”, in addition to the above-mentioned TV screens, there are many other visual metaphors, such as mirrors. Director Satoshi Kon likes to use mirrors very much. He frequently borrows “image in the mirror” to show the protagonist’s personality imbalance and split between Mima and the murderer Rumi staying in the United States. Among them, in order to show Mima’s struggle and reconstruction in the process of transforming into an actor, Mima and the mirror image of himself appeared 21 times.
At the end of the film, The murderer Rumi in the hospital and the idol singer in the mirror looked at each other affectionately. Unlike other animals who are dismissive of their own mirror images, humans are a kind of mirror-loving animals. Lacan’s psychoanalysis of people and mirror images provides us with help in interpreting the deep connotation of images in mirrors in movies. He pointed out in his discussion of the “mirror” theory: “The process by which the child in front of the mirror refers to his image in the mirror as another child to recognize that it is himself includes a double misunderstanding: when he When he refers to his mirror image as another child, he refers to the “self” as the “other”; but when he refers to himself in the mirror image as himself, he regards the illusion of light and shadow as reality—confusing the reality And fiction, and from this, I began a lifelong fascination with my own mirror image.”
Aesthetics
I think, to put it simply, what aesthetics is discussing is the question of “what is beauty”.
There are different aesthetic styles in different films, and this almost establishes the atmosphere of the entire film.
In “Perfect Blue”, some people call it “horror aesthetics”, that is, the coexistence of horror and beauty. Generally speaking, horror is a kind of negative emotion of people, and it is completely opposite to comfortable beauty. But the ingenuity of this film is that the alternate between virtual and reality is seamlessly connected under montage editing, which allows the film to carry a considerable amount of interpretation and provides the audience with a rich imagination. It makes people look forward to the development of the story while they are nervous, and they still have an aftertaste after watching it.
There are a lot of sexual and violent scenes in the film, and the audience is not disgusted, but attracted. I think this is the unique horror aesthetic of this film.
Color composition
Color Theory is also pretty unique in “Perfect Blue”, and it’s worth analyzing. Instead of using traditional theories, such as red for danger and green for jealousy, Satoshi Kon used them in a more nuanced way to show the progress of a story.
What is obvious in the film is the large area of red. This is especially true for the first shot of Mima’s room with many red areas. And when she first found another self on the network, the red color of the whole room was more intense, while her whole face was in front of the red background, which indicated that the Mima involved in the madness and red start to as the dominant.
Since then, whenever a large area of red appears in the film, it indicates the gradual madness that Mima experienced, and Mima’s mind is gradually collapsing. Until Mima faced her fantasy for the first time, the tone of the picture gradually shifted to red.
And this makes sense throughout the film, not only on Mima but also on murderer Rumi. When the film is nearing the end and the identity of the murderer who stayed in the United States is about to be revealed, there is a scene where both Mima and Rumi are in front of the red background, indicating the next thing.
This film uses red to the extreme, and each picture has an intention to convey. I think this is also the difference between animation and live-action movies. In live-action movies, the camera shots are not as fully controllable as animations. There may be some stuff in the shots that the director did not expect. However, the appearance of the objects in the animation screen is all moral and all have their own functions.
Rhythm
In movies, the rhythm not only refers to music but also related to pictures, stories, performances, etc. In my opinion, the simplest understanding of rhythm is the speed change. The film itself is also an art form that attracts attention. Therefore, the rhythm cannot be fixed. It will make people feel bored, and it will not change all the time, making people feel confusing. Excellent works can affect the audience’s attention and allow them to focus on the work. Give the audience a new rhythm in the familiar rhythm, which will always remain attractive.
In “Perfect Blue”, there is a plot where the writer is killed, and the rhythm is used very well.
In the beginning, the bloody warning, illuminated by the red light, foreshadows what will happen next.The writer got out of the car and looked at the empty parking lot. At this time, the camera moved, the noisy music in the background gradually increased, and a tense atmosphere was slowly created.The writer suddenly shouted and the shot turned to an extreme close-up shot, breaking the previous rhythm here.A wide shot, the music in the background stopped, and the tension was weakened again as if to let the audience relax.The writer pressed the elevator, but the music started again and the writer turned around. Now the rhythm became tense again.As the music grew louder, the camera circled around the writer, matching his nervous expression and creating an atmosphere of panic.When the elevator door suddenly opened, the writer quickly turned back, and the music suddenly grew louder as the door opened. The quick rhythm made the audience nervous.The red carpet and the music signal that the writer is about to be killed, and the panic is at its peak.Since the foreshadowing has already made things clear, a relatively slow shot is given here. The music becomes smaller and the elevator door opens, revealing the ending of the writer’s death.
In my opinion, the biggest difference between stylized walk and normal walk is that the former has emotions, and the audience can clearly understand the current character’s mental state from this animation. The animation is not like a novel. The information that the audience gets is from the source and the picture. We can’t directly tell them that the protagonist is happy or sad now, but to convey the message through performance.
What sort of things should we be trying to put in to a stylised walk?
As for the principles of animation, the timing, arcs and pose to pose that is considered when making a normal walk should also be considered in the stylised walk. In my opinion, in the basic walking exercise, you can get a basic stylised walk by changing the amplitude of the pose, adding slow in&slow out, and adjusting the timing.
For example, in this week’s production, I chose Tomas cat to make animation. His action style would be more exaggerated and the movement range would be larger. When making, you should consider adding body bending. Note that Arcs and Squash&Streach should be more obvious in cartoon characters. At the same time, pay attention to the movement and overlap of the tail and ears. The movement poses of the legs and hips have not changed much. What needs to be noted is its timing. The frame number of the key pose should be determined according to the reference.
What principles have we been focusing on so far?
In the previous animation, we mainly focused on the squash&stretch, timing, arcs.
What principles should we now be focusing on?
Now we should also foucs on the pose to pose,overlaping,slow in& slow out
What is the correct workflow for reference?
I think when looking for a reference first, we should know what a good reference is. For me, a good reference should be clear, preferably with both front and side images. At the same time, its playback speed should be normal, and it will not accelerate or decelerate, which helps me grasp the rhythm of the animation during analysis.
After finding a good reference, I will analyze this movement first and select the keyframe. I generally choose the previous frame of the movement trend change as the keyframe. I will take a screenshot and mark the number of frames, and then export a sequence of frames or gif for subsequent reference.
I chose Tomas cat in Tom & Jerry, because I watched this animation since I was a child and have a deep impression of Tomas’s confident walking posture, so I first looked for the video clips in the original. But I found that there was only one angle, and I couldn’t see the position of some mountains and legs. So I looked for other similar action references, including real-life and animated ones.
These are my reference footages:
In terms of timing, I mainly refer to the original animation. I disassembled it into a storyboard and marked the keyframes, stepping on me to determine the timing of the animation.
Here is my storyoard:
I first made a video of 24 frames per second and marked each frame.
Then I try to reduce the number of frames, I finally reduced to 11 frames, including the first frame and the last frame. I chose frame 1, 4, 6, 7, 11, 13, 16, 18, 19, 23, 25.
They are almost indistinguishable visually, and the persistence of the human eye is enough to make the 11-frame picture look coherent.
Then I drew an animation referring to all my materials to determine what I wanted to look like.
So I got a clear reference, which is basically the same as the walking animation before.
Here is my blocking pass of aniamtion:
Part2:Breakdown of rigs
What is a good rig?
For me, a good rig is when I open the project, I see neat Control Curves, and the position of the control curve should be clear; the animator should be able to know exactly what effect the curve will have on a specific part of the character , Without having to select it first. The control curves should also be large enough to be seen so that the animator can easily select them.
Of course, there are some excellent bindings with GUI Picker, which is more convenient for animators to choose a controller, especially facial animation. Because the face usually has the densest controllers, in order to make more subtle expressions.
When it comes to expression animation, a good rig usually has more freedom of facial animation control, especially the eyes and mouth. They can achieve more changes than simply blinking or opening and closing the mouth. Some bindings can even achieve pupil scaling.
A good rig should also have the function of switching between IK and FK. Although most of my animations currently use IK, especially leg movements, sometimes I want to use FK to achieve specific postures for some hand animations. . So it is best that each finger joint can be controlled individually.
When starting an animation, a good Rig should have clean deformation, which is the most important aspect in my opinion. When the character raises his hand or bends over, his shoulders and stomach should deform correctly. This requires very precise weight rendering and grid structure.
Finally, I would like to say that it is best to have an overall zoom function so that the character can adapt to various scenes or make scale animation.
What is a bad rig?
I think in simple terms, bad rig is the opposite of good rig, bad deformation, unclear controller, etc. I haven’t used bad rig too much, generally I just give up when I see bad binding haha.
However, I have had a problem. In fact, the rig includes the foot controller but there is no clear control curve. Therefore, I did not find that the tiptoe can be made directly but by rotation, which caused the final animation effect to be bad.
So, in order to get a better understand of the rigging, I tried to use Advanced skeleton5 to rig a model I once made.
I mainly tried facial rigging. At first, I was quite satisfied with the results, but when I used his own expression parameters to test, I found some problems, such as strange deformation and wrong mouth squash.
If you want to achieve natural deformation, you need to further modify the weight. I tried to control the expression manually and got a slightly better expression, but it really cannot be said to be a good rig because it is not convenient to use. Hope I can further learn how to optimize the binding to improve this problem.
Part3: Constrains in animation
What are constraints?
In last week’s blog, I briefly wrote about the use of parent constrain. And there are other forms of constraints. Constrain is a very convenient feature that allows us to constrain the position, direction or scale of an object to other objects. In addition, with constraints, you can impose specific restrictions on objects and automatically perform animation processing.
Parent
With parent constraints, you can associate the translation and rotation of one object with another object so that they behave as part of a parent-child relationship with multiple target parent objects. It should be noted that the rotation of the child object is around the parent object.
When a parent constraint is applied to an object, the constrained object does not become part of the constrained object’s hierarchy or group, but remains independent and behaves like a child of its target.
Point
The constrained object only restricts the displacement of the constrained object but has no effect on the direction.
Orient
The constrained object only restricts the rotation of the constrained object but has no effect on the displacement. The rotation here is the respective rotation.
Scale
The constrained object only has a constraining effect on the size of the constrained object and has no effect on others.
Aim
Aiming constraints limit the direction of an object so that it can aim at other objects. Typical uses of aiming constraints include aiming lights or cameras at an object or group of objects. In character settings, the typical use of aiming constraints is to set a locator to control eye movement.
Pole vector
The pole vector constraint causes the end of the pole vector to move and follow the position of the object or the average position of several objects. In the character setup, the pole vector of the IK rotation plane handle used for the arm joint chain is usually constrained to the locator placed behind the character.
Parenting vs parent constraint?
“Parenting” neutron objects can still move freely,
The child object in “parent constraint” cannot be moved, even if it is moved, if the parent object is moved again, it will be restored to the position at the time of constraint, unless the offset value of the child object is adjusted separately;
“Parenting” has an effect on the “position”, “rotation” and “scale” of the sub-object
The “parent constraint” only affects the “position” and “rotation” of the child object.
————————————————————————
Finally, I want to mark something, I think these are indeed easy to overlook but have a very important impact on animation production.
Common areas people skip:
Breaking down reference footage in to storyboard key poses and inbetweens with frame numbers.
Considering that I tried to polish the walking ball last week, so I plan to add a prop to the final walking animation, and I’ll do a new walking animation to practice polishing.
Last week I made an animation of the walking ball, considering that the ball has no hands, I wanted to add something to his bald head, like a hat.
I found a suitable asset on Sketchfab. After resizing and positioning, the ball had a Magic hat.
For the hat to move with the ball, I need to make a parent constrain here. The head of the ball is the parent object and the hat is the child object. Before doing this, I create a control curve for the hat to follow, which is very helpful for me to do the next step.
Next, I just need to choose rigging->Constrain->parent, and the hat can follow the ball.
But the effect is a little stiff, the hat itself is too rigidly attached to the ball, and the tail-like part of the hat doesn’t move. To achieve these effects, I think I should create some bones to the tail-like part of the hat firstly.
Actually, I think that not only does it look like a tail, it moves in the same way. In other words, the principles of animation to be considered here are also Timing, Arcs and Pose to Pose.But because this part is smaller, it doesn’t have to be as exaggerated as the pose of the tail.
In addition, the hat should not touch the head all the time, it should be a little wobbly, especially when the ball is moving up and down, the hat can leave the ball in the air for a short time. So I need to keyframe the hat on the Y-axis. But I can’t use the control curve that I made for the hat before, because it’s a child of the ball, which cannot be changed. Therefore, I made a group of the mesh of the hat, so that I can control the up and down movement of group1 to indirectly control the movement of the hat.
This is my final animation:
About polishing, I first made a loop animation of walking in place this week. I think this kind of loop animation should be more common in game production. On the other hand, polish the loop animation first, which is also helpful for making other animations later. In the production of full-body walking animation, in addition to the legs and hip that have been practiced before, the rotation of the shoulders and the swing of the arms are also important, which is also explained in more detail in the The Animator’s Survival Kit. Here,I think that the key principles are to Pose to Pose, Overlapping, Timing and Arcs, and of course some Stretch&Squash. I mainly refer to this video:
Here’s the walking loop animation I making:
But it’s still a little boring to animate in palce, so I wanted to animate the whole body with some props, and try to animate something with some contents, like plots or just some atmospheres. So I chose a Robot from the Assets Library, and I wanted him to take a hand gun. I did this by making the Robot holding the gun with its right hand at frame 0, then using the parent constrain to keep the gun in the robot’s hand.
The whole process is similar to the previous animation of the walking ball, and it is also the previs->blocking->spline->polish. Moreover, because the gun is held on the robot’s hand all the time, there is no need to wave the arm, and only need to pay attention to the rotation of the shoulder.
Then I added some details, such as the rotation of the toes and the twist of the waist. I also made a simple scene. But I think the final animation is not good, the Robot should be some mechanical, but it’s a little difficult for me right now. I hope I can refine this in the future..
This is my final animation:
I also tried the lighting and rendering flow, and this is a rendering image.
Politics influences all kinds of media, the values expressed by the media, the level of violence in games, the characters in movies and so on. And the wide spread of media will affect politics in turn. For example, the South Korean film Hope has made the South Korean Parliament raise the sentencing standard for child sexual assault crimes through its realistic content. So politics and the media are close, and today, they are more closely related.
What politics affect media?
I think basically, it often influenced the values, like most movies are good over evil, or they have a happy ending. Of course, there are also some influences of social concepts, such as violence or cigarettes, etc. Most films or online streaming and TV will express views that are more in line with public concepts, and generally will not encourage violent behaviors or smoking.
How do politics shape what is being made in media?
In class, Luke mentioned a scene in The Avengers 4: The End Game where all the female superheroes fight together. Nowadays, the society pays more and more attention to the rights and interests of women. The addition of this plot in the movie also echoes the reality.
For films, games, online streaming and so on, the influence of politics on them is mainly reflected in plot design, lens language, and in deeper aspects, which may affect the content they want to express.
Game
When it comes to politics affect games, it’s often associated with violence, such as how bloody the game is. In Call of Duty 6: Modern Warfare 2, there’s a level called “No Rassian”, which has a bloody reminder that might be uncomfortable for the player to jump through.
And I also noticed another thing, some of the early games will try to make the female characters more sexy to attract the players, but now there is a view that this is materialized women, it ‘s disrespectful. On the other hand, it also ignores a lot of female players. So now some game makers will avoid too sexy female character design, Laura of Tomb Raider is a good example.
Film
In class, we mainly discussed the placement of advertisements in some movies, and how these affect people’s consumption concepts.
What impressed me most was the Transformers series, which was made to show cars, and I still remember my excitement when I first saw bumblebee become Comero on the screen. A nd Comero is so cool!
In fact, product placement has existed since the birth of movies. In the spring of 1896, when the Lumiere brothers, the fathers of motion pictures, were still practising in various “micro-films”, a Swiss businessman named Henri Lavange saw a business opportunity and asked for a bar of soap to be implanted in the short film, promising to help them release it. So here’s the shining sun brand soap in the Parade of the 8th Battalion.
But not all ads fit into the movie so naturally. I want to focus on Transformers: Age of Extinction. There are too many ads for this movie. And I don’t know if it’s because the story takes place in China, there are too many Chinese products in the movie, and the story doesn’t fit that well, especially for a Chinese milk brand, which appears repeatedly.
“Can I finish my Shuhua milk first?” It’s embarrassing to say. It’s like saying that we’ve received an investment from Shuhua Milk. We can see a lot of other product placements in this movie. Like the Beats speakers and Oreo crackers. Of course, it’s easy to understand when you consider the huge amount of money needed to make a sci-fi blockbuster. But I have to say these ads are so embarrassing, and it’s hard to get into the story.
TV & Advertising
In TV media, whether news or TV programs, the topics and opinions discussed are closely related to politics or public opinion.For example, the attitude towards cigarettes, which are harmful to human health, has basically become a common sense. Therefore, international restrictions are usually imposed on cigarette advertising. Before the public realizes the harm of cigarettes, cigarette advertising is quite common.
(Advertisements for Winston, a cigarette, appear in the American animated series The Flintstones)
The lack of cigarette advertising on television is also justified by the Framework Convention on Tobacco Control (FCTC), the first global treaty to come into force under the auspices of the World Health Organization (WHO), which came into force on 27 February 2005.Under the Convention, all cigarette packages are required to carry health warnings that “smoking is harmful to health” on at least 30 percent of the surface area, and all tobacco advertising, including all forms of image advertising, promotion and sponsorship, must be banned for a certain period of time.Widespread prohibition of tobacco advertising, promotion and sponsorship in radio, television, print and, where appropriate, other media, such as the Internet.
In my opinion, this is the positive influence of Politics on media, which has a positive effect on people’s physical health and concept.
Online Streaming
I think online streaming is similar to film, game, TV and so on in many aspects, and they are also influenced by politics.And some plot design, to some extent, is more influenced by culture.There is a point here that, regarding the protection of children, in the American film rating system, there are corresponding regulations for every level, while works rated below PG are prohibited from the death or serious injury of children.And this is in some eastern works, sometimes the death of a child is used to reflect on the war or to warn people.
For example, Japanese director Isao Takahata’s “Grave of the Fireflies” features the death of a child.
I think there is no right or wrong, but in different cultures, people’s different ideas and policies have different influences on media.
In my opinion, the influence of politics on the media reflects the development of society, the change of people’s ideas and the diversification of their thinking.A lot of influences that didn’t exist before, not only are people not paying attention to such problems, but also new solutions are emerging.The media is always a reflection of The Times.
As for the political issues of the current era, I think maybe two topics can be mentioned for discussion of future politically related animations.One is the current cultural integration and conflict, or cultural invasion.Another thing I would like to explore is the influence of political opinions carried by various media on individuals.
First, I need to find a clear reference, preferably with a frame count and a corresponding pose.
Previs, Blocking, spline and polish:
This is the usual way to do animation, or I think it can be a common way to work in other fields. That is, starting from layout, first complete the first overall matters, then make them in turn, and then decorate them all together.It’s efficient.Here I refer to 《The Animator’s Survival Kit》.
The reason for not making loops is also mentioned in this book, which would make the animation look very stiff, as game animations could be made that way, it was interactive. Animators should focus on more interesting and attractive animations.
Previs: Start with a rhythm. Instead of using spline, start with step Tangents. I choosed 5 frames, and I started with 12 frames per step, 24 frames per second.
In addition, you can save a lot of time by setting the mode in Preferences in advance.
Blocking:I pose on the keyframe determined by previs. First I just focused on the side view and animated the walk. And adding start and stop action, mainly pay attention to the center of gravity changes.
After making the side and looking at the front, we can see that the ball now walks straight without any body shaking. However, when walking, the center of gravity will change from side to side with the lifting of the legs, so we need to add the rotation and translation of the ball body here.
At the end I added a turn to move, considering the bending direction of the knee, and I need to add key frames to the knee, and the animation of the knee joint is dependent on the IK.
Again, I’m going to animate with step tangents, but notice the change of center of gravity here.
Before spline, I checked the blocking animation for several times again, so as to confirm that there is no sliding part on the foot. If it needs sliding, it is better to make a steady step first and then add sliding, so as to make it more convenient for making and modification.
Ok, now that we can change Step Tangents to Spline Tangents in the curve editor, you can see that the action is smoother, but it’s a little weird.
In the curve editor we can see that there are a lot of keyframes, and I think this might be a strange time to change the action too much, so I decided to try to delete some of them first.
I noticed that there were some problems that occurred between two key frames with the same value, and Spline Tangents made them fluctuate between them when we actually wanted them to be horizontal.I ended up using Auto Tangents to solve this problem.
Finally, in the polish part, I would like to add some Squash&Stretch to the ball to reflect its elasticity and give people a soft feeling.
This is my walking animation:
But I have to say that I don’t like the final animaiton. I don’t know what the problem is, I will study further and improve this animation later.
The task was to animate the ball with tail at least five times, starting, as usual, with a reference video to analyze the motion.
I mainly refer to this video.
All three states of the tail animation is very clear, is a good reference video.Through the video, I found that the principles of Aniamtion which should be paid more attention to in the tail animation was squashed and stretch, brimmed with anticipation, arcs and timing.Moreover, since the tail itself follows the movement of the ball, the animation can be divided into two parts, one is the movement of the ball itself, and the other is the swing of the tail
First of all, I wanted to make the ball more than simply jumping on the flat ground for five times in a row. I wanted this animation to be more interesting, so After I imagined the movement route of the ball, I first designed a sketch in PS, which was mainly about the design of pose and movement track.In my opinion, the most attractive factor of an animation is the change, such as the change of speed and shape. If it is just a simple repetition of a movement, even if it is very interesting, people will soon get bored. So I wanted the ball to rise up in the first few jumps, then jump off the platform like a diver, and finally give the ball a cushioned jump and brake, so that the animation was more like a plot-like animation than a boring repetitive jump.
The overall process is similar to last week’s maze animation, but I have tweaked it in a few places.
First of all, on the Y-axis transformation, because this time the ball is not only experiencing force change, but also exerting force itself, I let the ball stay for two more frames when it falls on the ground several times, giving it one more time to change.
In addition, I noticed that the squash-Stretch of the ball also needs to be further optimized. The compressed state of the force of the ball and the vibration of the ball when it falls from the height can be reflected in Squash-Stretch.
(Its own power)
(Shock buffer on landing)
And then the animation of the tail, and I think arcs is very important here, because the tail itself is soft, and the smooth curve makes the tail look smooth.In the process of making the tail, I first set the pose of the tail at several key frames. It should be noted that the closer the tail is to the body, the more the tail is swung and the whole tail moves like a wave.Then gradually add details to smooth the movement of the tail.It’s worth noting that because the ball is jumping so much, the tail should also be brimming. I think it’s the principle of brimming for baby. If I want the ball to jump for baby, I will put the ball into compression and feel brimming with anticipation with its tail pushed up.
This is my tail animation:
Tips: At the beginning, use as few keyframes as possible to determine the motion trail of the ball, as the tail animation may need to be modified later.Fewer and more accurate keyframes will make the changes clearer.
As a form of expression, film has its limitations. It is more suitable to express conflicts and dynamics. However, some thoughts and concepts in film are difficult to express clearly like words.This is because the film can only record the external results, namely the action response caused by the motive, thought or desire, but can not record the inner thoughts. As Robert J.Flaherty once said, “You can’t express as much as writing, but you can say what you want to say with great persuation.
Camera
Film is a kind of modern art which is composed of continuous images and images, and combines the visual and auditory senses.These continuous images are from camera imaging, so the creator should first understand camera if he wants to create.
Dolly zoom was first introduced in Alfred Hitchcock’s 1958 film Vertigo.I think that’s why it’s also called the Hitchcock zoom.
In the above film clip, in the scene looking down the stairs, you can clearly feel the perfect pressure from acrophobia.
Mise en scène
All these things create a space in a frame, they just like the words of the film language. But to learn how to use them and put them together, we have to learn about editing.
Editing: create and control the space and time
Sequence shot: usually over a minute and takes in a lot of action in a scene
The cut: it’s the transition between the end of one shot and the beginning of another (Dissolve; wipe; fade in/fade out;…)
Continuity editing, the creators use the lens language to connect the shots taken in different time and space without being noticed by the audience, as if they happened at the same time.
Continuity error: the logic and something doesn’t match with what shows up on screen
To make it right, we should notice the screen direction, match on action, eyeline and 180 degree rule. Sometimes this rule is broken, it’s called crossing the axis.
The basic scene will start with an establishing shot, this shows where the scene takes place, then the master shot, a wide shot that shows a scene in its entirety to everyone’s location, and moving into a close-up, then cut to the reverse angle, and the more important detail should be shown in close as an insert shot
We can use these single shots to combine a clear, attractive story that can express our idea.
Cross cutting, this is the unique advantage of the film. It can tell different things in different time and space at the same time. These things may have external connection or not, which gives the audience more association. I think it is also called discontinuity editing.
Montage: Connecting some images together organically can convey new meanings and exchange feelings and thoughts.
History
Here I want to talk about the development history of film, animation and VFX together, because I think they are interrelated and inseparable.
“The Magic Lantern” was invented by Jesuit priest Athanasius Kircher in The 17th century. This is animation, as it were, and the beginning of all movies. The magic lantern is an iron box in which a candle is placed. A small hole is cut on each side of the box. The hole is covered with a lens. A piece of patterned glass is placed behind a lens and the pattern is projected onto the wall by a light passing through the glass and lens.
In 1800, the first real animation appeared. It was a toy, a disc with different images on both sides. When people rotated it at a very fast speed, the images on both sides seemed to appear simultaneously.The same thing goes for the lantern, which is called the visual retention phenomenon, and I think that’s the basis of all motion images.
In 1895, the lumiere brothers with their own inventions improved camera shooting a film in the history of “factory gate”, the first film I have seen the film, although only one camera, shows the factory workers leaving the scene, but it also shows the beginning and the end of a shot, this is the beginning of the exploration of lens language. And the first film to be shown was the Water Gardener by the Lumiere brothers.
In the 20th century, thanks to the appearance of the camera, film and animation developed rapidly. In 1906, The American Blackton produced an experimental film which was close to the concept of modern animation. The film was called “Humorous Gesture under a Funny Face”. Meanwhile, French magician GeorgeMelies brought his own form of magic to the big screen when he released his first film, Indian Rubber Head (1901). The following year, he released A Journey to the Moon (1902) and Dancing Dwarf (1902), using just about every special-effects technique in use today. This is arguably the first film to use VFX.
In 1914, American Winther McKay created the animated film Gertie the Dinosaur. The background and foreground characters were repeatedly drawn in each frame, and the total number of animated films was more than 5,000. Although the picture has a sense of shaking, the whole film looks vivid and natural, and the effect of hand-drawn shaking has been continued to this day, which has become one of the methods that experimental animation artists are fascinated by.
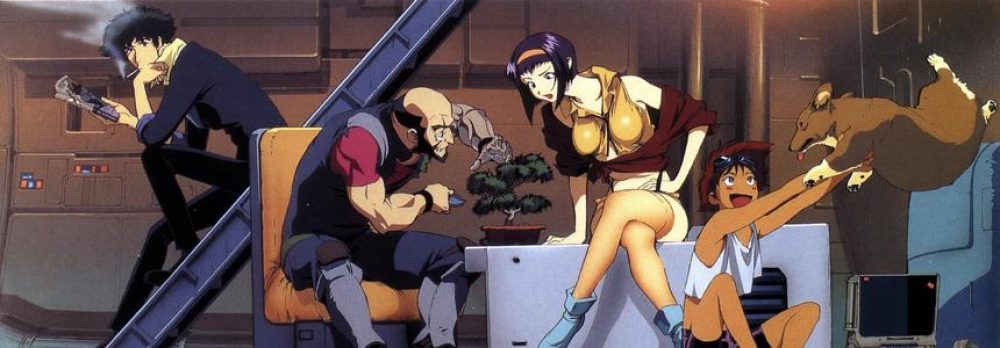
In 1928, Disney released the cartoon steamship Mighty with Mickey Mouse as the main character, which was the world’s first sound animation with simultaneous sound and painting.Before that, silent films mostly required live music.Up to now, the picture of Mickey whistling and sailing has been used in the opening title of Disney animation. This form of music matching the picture has also been used by artists for a long time, and the cat and mouse that I have been fond of watching since childhood are also in this style.
In 1932, Disney released Flowers and Trees, which was shot with color film for the first time, making it the world’s first color cartoon and the first film to win an Academy Award for animated Short film.
In 1933, King Kong was released. The combination of stop-motion animation and live-action shooting ushered in a new era of full-length animated films.Getting characters to move was difficult, though, until Ray Harryhausen’s “Jason and The Argonauts” (1963), which included the famous stop-motion “skeleton battle sequence” that still inspires filmmakers today
In 1937, Snow White, the first theatrical animated feature film in the history of world animation film, was released.
In my opinion, the 40-plus years since the introduction of the camera have been a time of rapid development of film language and creativity, and some of these ideas are still in use today, such as inverted, mask, discolouring and so on, which can be basically seen in the special effects on Tiktok (haha).
Throughout its history, creators have persisted in creating fancier images and inventing more advanced technologies, all of which were greatly accelerated with the development of computer graphics in the late 1960s.Animation, VFX and film have all entered a new era with the development of computer technology.
By The 1990s, we could see such realistic animation effects on The screen as classic works such as The Abyss, Terminator 2 and so on.In 1993, Spielberg’s Jurassic Park almost revolutionized the process of computer graphics, the skeletal, skin, and muscular systems that have been used to make creatures until now.
Later, in the 21st century, more computer-based technologies emerged, such as motion capture, facial expression capture, three-dimensional reconstruction, etc., all of which allowed creators to put more energy into creating interesting stories. Of course, some excellent outdated technologies are not discarded, they just appear on the computer in another form, such as the Japanese anime that I like very much. Nowadays, celluloid is almost no longer used, but computer drawing is used, which has been greatly improved in effect and efficiency.
From the beginning of the emergence of animation and film as art forms, they have been inseparable with the development of technology. Throughout their history, every breakthrough in art has been related to the update and development of technology, no matter in hardware or software.In my opinion, for art forms such as film and animation, it is not enough to just study the composition and color of the surface layer. Each new effect and new creative idea are closely related to the underlying technology. New technology gives rise to new art forms, and new art forms guide the development of technology. It goes hand in hand.